Tipsy Boat Restoration: Transforming a 1983 Gheenoe Highsider

Introduction

 At the beginning of last summer I purchased a 1983 Gheenoe Highsider 15’4″ off of Facebook Marketplace. At some point between it’s conception and the time it got to me, someone had added a layer of chop strand fiberglass to it and never got around to painting it. So when I pulled up to the guys house, there it sat in all her glory. A beat up, forgotten boat that was just in my budget. Perfect. I quickly put a layer of paint on it and added a trolling motor and spent the summer fishing.

While it was enough to get me out and on the water. It left a lot to be desired. It seemed like I tripped over the middle bench seat every time I shifted from the tiller motor to the front trolling motor. The space ahead of the front bench seat was just about useless other than storing an anchor or something. After a summer spent crouching down to control the trolling motor and tripping over the middle bench seat, I decided to rip out the middle benches, lay down a floor, and add in a front deck.  

Just a quick disclaimer that this is my first time doing fiberglass work and it wasn’t perfect. However, in the end it got the end it got the job done. Hopefully, this article will give a good launch point for someone looking to do a similar build. At very least you’ll see what not to do!

Design

 The goal of the rebuild was to make the boat more fishable. So first, I drew up the floor layout. I really liked the idea of adding in a grab bar. Not only is it huge for stability when moving around the boat, but it will also serve as a psuedo-center console and back rest for the cooler seat. Every boat needs a cooler seat. Enough said on that. The addition of the front deck is to allow for a little more usable floor space with the idea to store things underneath and have floor area on top for tackleboxes and whatever else. It is a tipsy boat so I decided that some sort of seat post uptop would be nice to lean on and keep balance while casting and operating the trolling motor. I looked into the fold out trolling motor mounts that go on front decks, but decided against it to free up as much space as possible on the deck. There’s just not that much space on Gheenoes. I figured I could find a spot for the battery after its built but will likely run the wiring underneath the front deck as well. And push pole… I’ve just always wanted one. They are nice to have when its too shallow for the trolling motor. 


Materials and Tools

Materials

  1. Nautical 15 Coosa – 1/2″x4x8 sheet
  2. XPS Foam Board – 4×8 sheet
  3. Woven Fiberglass Clothe – 36″x30′
  4. West System 105 Epoxy Resin – 2 gal
  5. West System 206 Slow Hardener – 55 fl. Oz
  6. Colloidal Silica Filler
  7. West System Pump Set 
  8. Total Boat 1 Part Polyurethane Topside Paint

Tools

  1. Grinder
  2. Jig saw/sawzall
  3. Skill saw
  4. Tape Measure
  5. Knife
  6. Laminating Squeegee – 2-3
  7. Plastic mixing tubs for the resin – 5-10
  8. Sandpaper
  9. Orbital sander

Seat Removal

I started with removing the middle bench seat. Mine is the version where they used an aluminum bracket riveted into the fiberglass and gunwales as the middle support. So first, I had to drill out the rivets in the gunwale. Then, I used an oscillating mulit-tool to cut the seats out, which did an okay job. It was just really slow. I wish I had Sawzaw or something which might have sped up the process. Whatever, you use to cut away the seat, make sure you cut about a 1/2″ away from the floor of Gheenoe. I did this to make sure I didn’t accidentally cut into the floor.

 After the cutting was over, I went back and removed the rest of the material with an angle grinder. Again, a flap disk probably would have been a smoother process, but I’m just cheap and made what I had work.

 I also ended up cutting out the tops of the front and rear seat which got busted up over the summer from a clamp on swivel seat. It would have been nice to keep the original seat tops to use as a line for the front deck, but also the foam inside was waterlogged from being opened up by the old mount holes. The last bit of cutting I did was to cut a bigger drain hole through the rear bench seat. This was in preparation for the new water drainage system after with a raised floor.

Cutout Templates

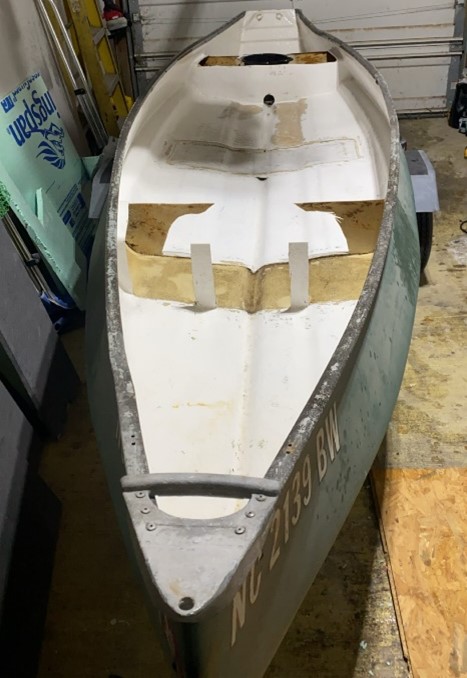
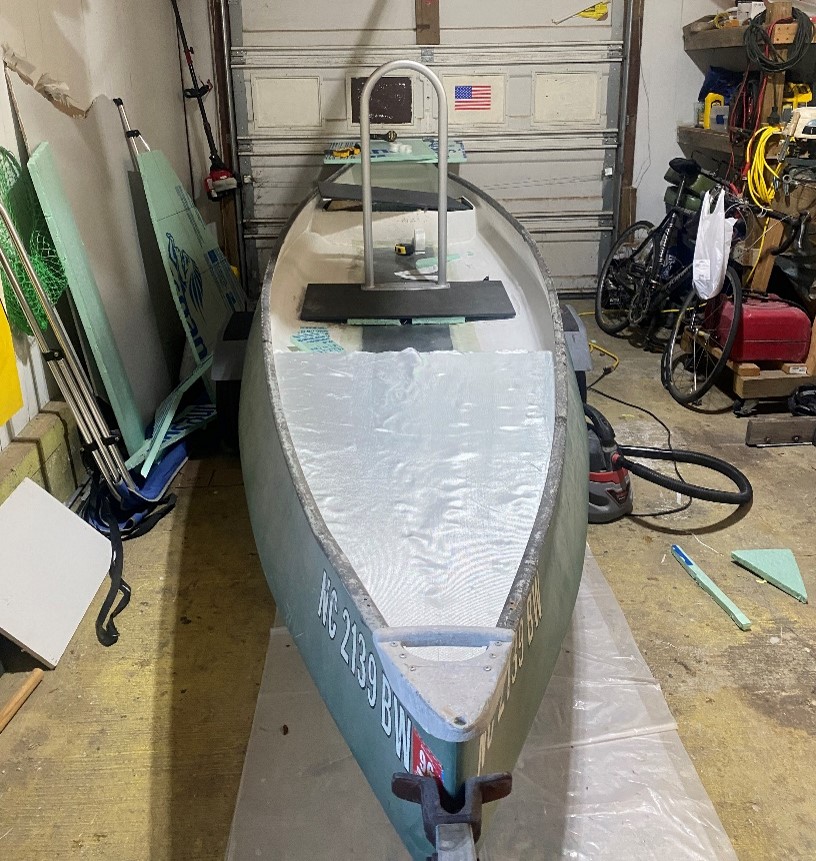
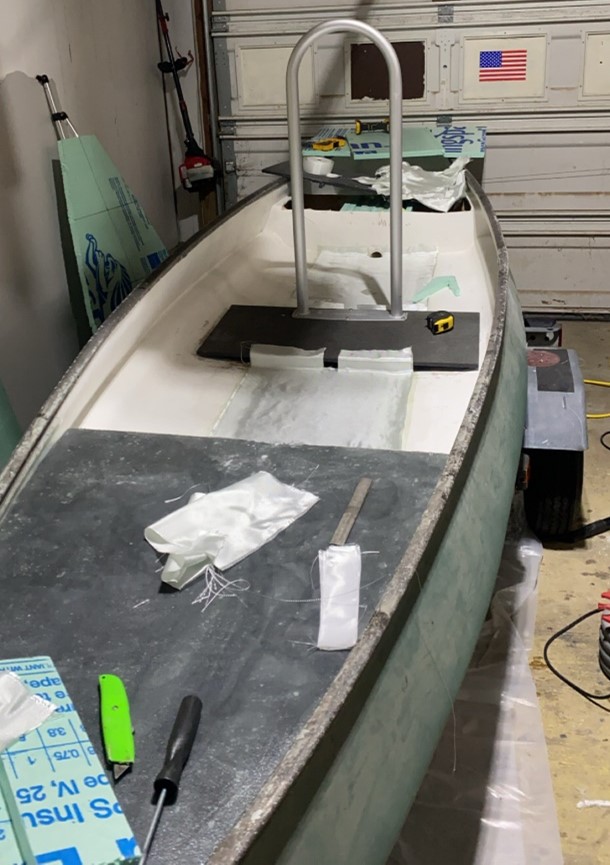
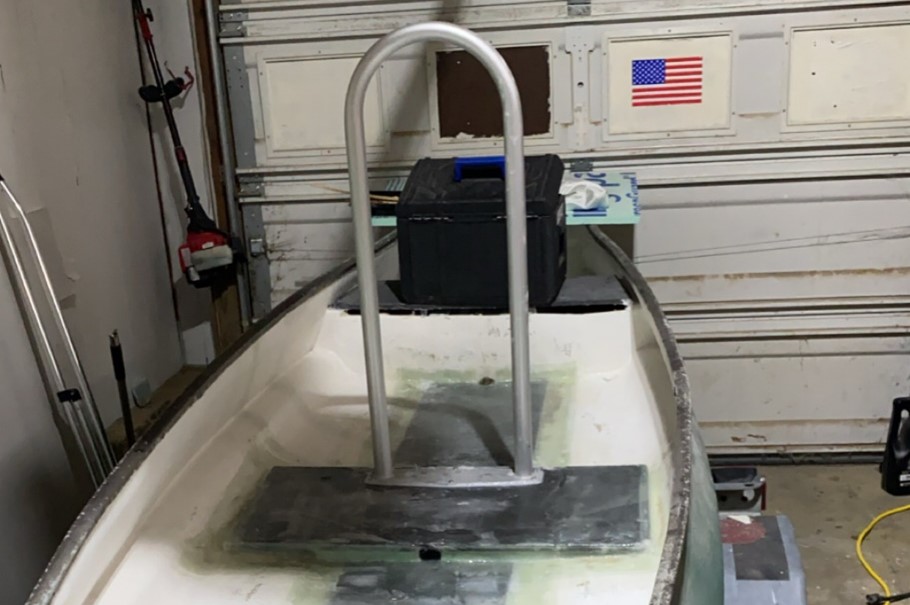
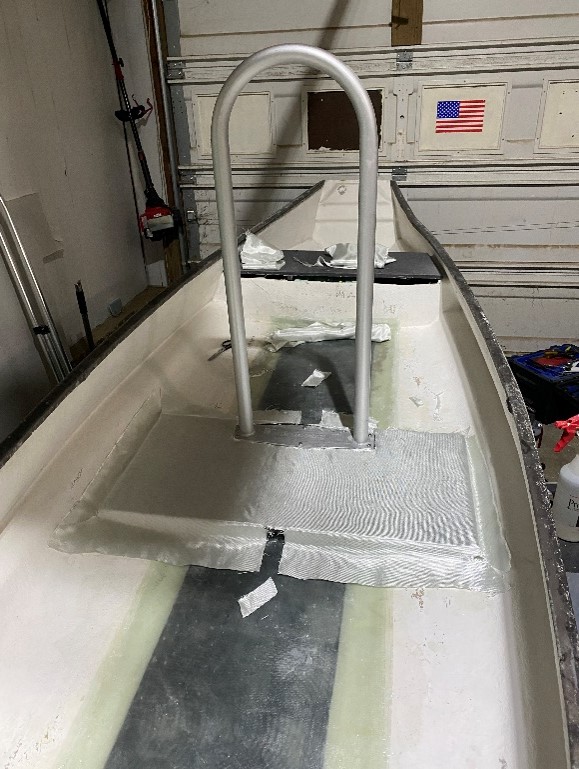
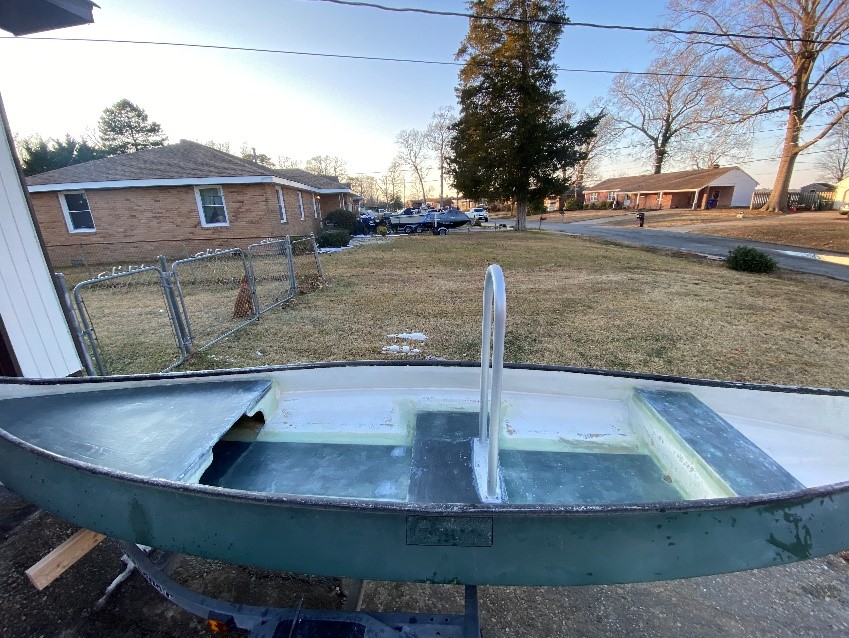
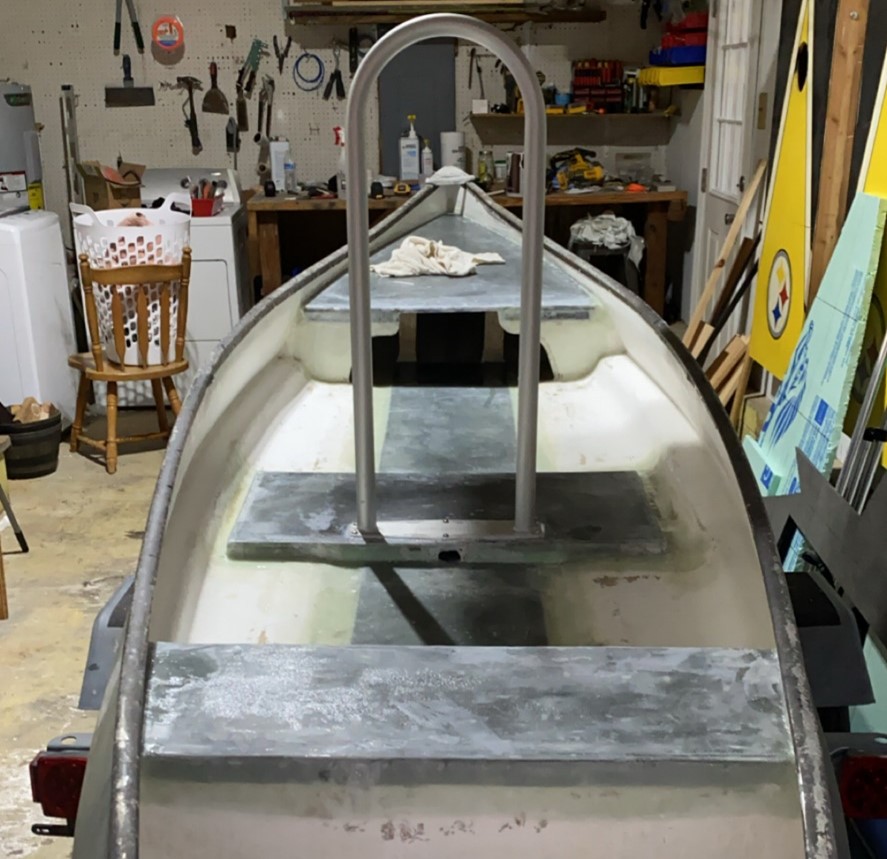
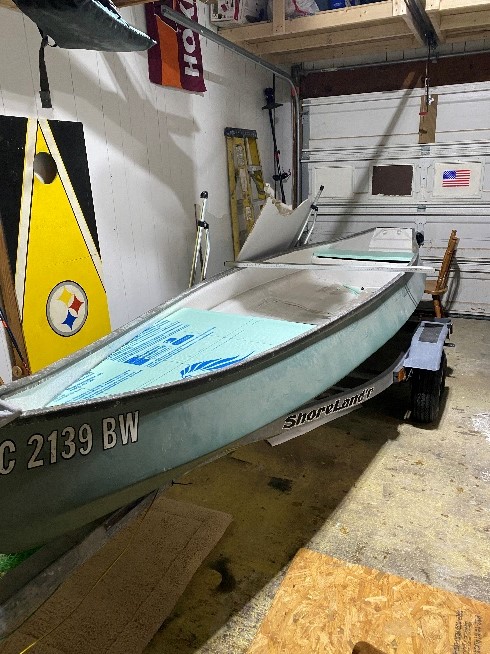
I used XPS foam as templates that I traced onto the Coosa board because I didn't want to waste any Coosa material. I think this ended up being a good move because I got all the correct cuts the first try and when I was done with the foam, I put it back inside of the back seat for flotation. It also helped to layout all the foam onto the Coosa board to make the most of the usable space. The XPS was super useful in getting a rough fit and then trimming down to exactly what I was looking for. he front deck shape required the most measuring. To keep it level, I leveled the Gheenoe on the trailer, then marked a line along the sides at the height I wanted the front deck floor to be at. Then, I took width measurements of the cross section every foot starting at the rear side of the front seat. To translate the measurements onto the XPS foam, I marked a center line in the foam and measured half of the cross-section width each side of the centerline. After the foam was cut-out I mocked it up on the boat and trimmed as needed. The long center piece for the floor and the seat tops were pretty straight forward to measure.

Cut Patterns into Coosa Board

I laid out all the foam templates onto the Coosa board and started cutting them out. I wasn’t sure how stiff the deck was going to be and if I was going to need supports for it so I held off on supports during this step. However, I did decide to run stiffeners long ways on the bottom side of the front deck using 1″ strips. I cut the length of the center floor piece at 45° angle so it was sit more evenly on against the Gheenoe hull. I’m hoping that this avoidspressure points from the edges of the coosa board against the Gheenoe hull. When I got everything cut out and dry fit I could really see the project starting to come together. Little did I know, it still had a long way to go.

Fiberglassing

This step I had least experience with and had no idea how it going to go or even where to start. I did a lot of research online, talking to a few people with fiberglassing experience, and ended up making a test panel just to see how it worked before adding it the boat. With vote of confidence from my successful test panel I was ready to roll.

So, I laid out each floor piece on a long plastic sheet in my garage and gave it the old college try. Each piece of coosa got a layer of fiberglass on the top and bottom. So, I traced the patterns onto the fiberglass clothe, cut them, and laid ontop of side 1 of the coosa (which will become the bottom side when placed in the Gheenoe). I mixed the epoxy and hardener with West Systems Hand Pumps which are designed so 1 pump of epoxy requires 1 pump of hardener. This made it so I didn’t have measure as long as I kept track of the pumps (counting is easier said than done sometimes).

After I mixed the epoxy, I’d pour it out onto the fiberglass cloth situated atop the coosa. At first, I used a metal roller to spread the epoxy and smooth the cloth but I found the plastic/rubbery squeegee worked just as well and you don’t have to thoroughly clean it every time it’s used. This is also when I glassed in the stiffeners to the underside of the front deck and seat tops. I bonded the stiffeners to the bottom of the Coosa with the epoxy thickened by the Colloidal Silica 406.

At this point everything had its first layer of fiberglass applied and was ready to be added into the Gheenoe itself. But first, the front deck needed supports, so I used 1″ strips cut from the Coosa and thickened epoxy to bond the to the sides of the Gheenoe. I even went to the great lengths of going to Harbor Freight to find some quality deep throated clamps to keep the supports in place while drying

The last bit that I did before I started glassing the Coosa patterns into the boat was cut out a storage access area into the sides of what was left of the front bench. I made sure to leave supports for the stiffeners of the front deck to rest on. I tag teamed this job with my cut wheel and oscillator tool although, a jigsaw would have been nice to have here. I ended up smoothing out the jagged cut edges during the fiberglass phase and all was right in the world.

 With the supports in place, and front bench access cutout, the front deck was ready to go in. So, I switched my efforts to inserting the floor. The first part of the floor was adding the PVC pipe into the rear bench seat. I then cut a half circle in the back part of the floor insert to match up with the PVC entrance. I added fiberglass cloth and epoxy to the floor insert. Then used thickened epoxy to fill in the gaps between the Gheenoe and floor insert.  I stopped the floor insert even with the front bench seat so there was an opening between the bottom of the hull and Coosa insert. I filled it with spray foam insulation and sealed it off with thickened epoxy. 

With the floor finally done, it was time glass in the front deck. I cut the pattern out of the clothe making the sides slightly oversized so they went up the wall of the Gheenoe about an 1″ to 2″. Added the epoxy and filed the edged smooth with the wall of the Gheenoe.  

Grab Bar Installation

I debated on the best way to do this since I didn’t raise the floor up the full height. So, there wasn’t enough clearance for the bolts between the mount and Gheenoe hull. So, I added a raised surface with the XPS foam, glassed it in with cloth then chop strand, and finally filleted the seams with thickened epoxy. My main concern was that I wanted it to be big enough to put a cooler on as a seat. So, sized with a mediumish size cooler, and my battery happened to fit between the uprights.

It ended up being very solid and the raised portion actually was a good thing. It’s a perfect high spot the battery.  

Rear Seat

The last part to glass in was the rear deck. I sealed up the PVC pipe drain as best as I could and then cutup the XPS foam and placed it in the rear bench seat. Then, I glassed in the rear bench top into the Gheenoe. With all the fiberglassing done it was time to sand. And since it was my first time doing a fiberglass project there was a lot of sanding to do.

Sanding

This probably took the most time but it the simplest part of it.  Everywhere the new fiberglass or epoxy was raised compared to the old Gheenoe surface need to be sanded smooth. Also, the I used the orbital sander to smooth out high spots left from my fiberglass work.

Paint

With all the sanding done, I slapped the paint on adn got it out of the garage.